斐讯 N1 无论是尺寸还是性能,都非常适合做主路由/旁路由,F 大固件挺不错。没有 N1,使用虚拟机也可以,这里把之前折腾 Win 10 使用 VirtualBox 安装 OpenWrt x86 作旁路由教程重新整理记录一下。
「Win 10使用VirtualBox安装OpenWRT x86作旁路由:https://0xo.net/1318」这里虚拟机选择开源免费 VirtualBox,OpenWRT 官方也有适配固件和文档 OpenWrt on VirtualBox HowTo,不过得自己另外折腾酸酸乳科学上网插件……
这里 OpenWRT 固件建议选择佐仔志软路由固件 OpenWrt (x86_x64) 精简版,功能恰好够用,很不错。当然也可以根据教程自己编译。
「Win 10使用VirtualBox安装OpenWRT x86作旁路由:https://0xo.net/1318」OpenWrt (x86_x64) 安装
安装 VirtualBox,下载 OpenWrt (x86_x64) 镜像。
2023-10-21 更新:openwrt-x86-64-generic-squashfs-combined(新版本)
转换编译好的 OpenWrt (x86_x64) 固件
将编译完好的镜像文件 20231014.openwrt-x86-64-generic-squashfs-combined-efi.img.gz 解压,得到一个 20231014.openwrt-x86-64-generic-squashfs-combined-efi.img 这样的镜像文件。
「Win 10使用VirtualBox安装OpenWRT x86作旁路由:https://0xo.net/1318」进入 VirtualBox 安装路径,一般是 C:\Program Files\Oracle\VirtualBox,里面应该有一个 VBoxManage.exe 应用程序。
运行 CMD 命令提示符执行命令把 img 镜像文件转换为 vdi 文件,命令:VirtualBox 安装路径\VBoxManage.exe convertfromraw -format VDI 映像文件位置\openwrt-x86-64-combined-squashfs.img 转换后 vdi 文件位置\openwrt.vdi
实例转换命令:
「Win 10使用VirtualBox安装OpenWRT x86作旁路由:https://0xo.net/1318」"C:\Program Files\Oracle\VirtualBox\VBoxManage.exe" convertfromraw -format VDI "C:\20231014.openwrt-x86-64-generic-squashfs-combined-efi.img" "C:\openwrt.vdi"转换速度很快,生成文件 openwrt.vdi 备用。
VirtualBox 安装 OpenWrt
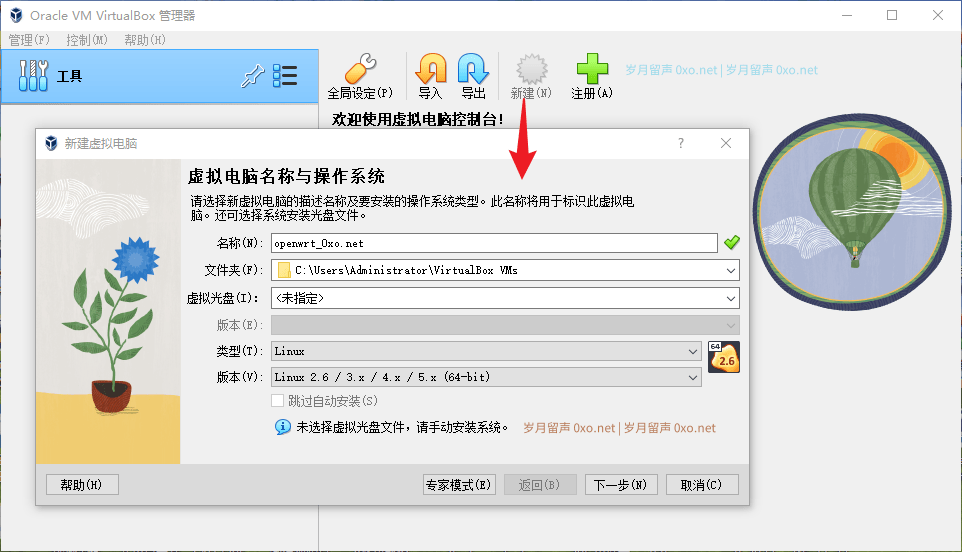
新建虚拟机,类型选择 Linux,版本选择 Linux 2.6/3.x/4.x(64-bit):
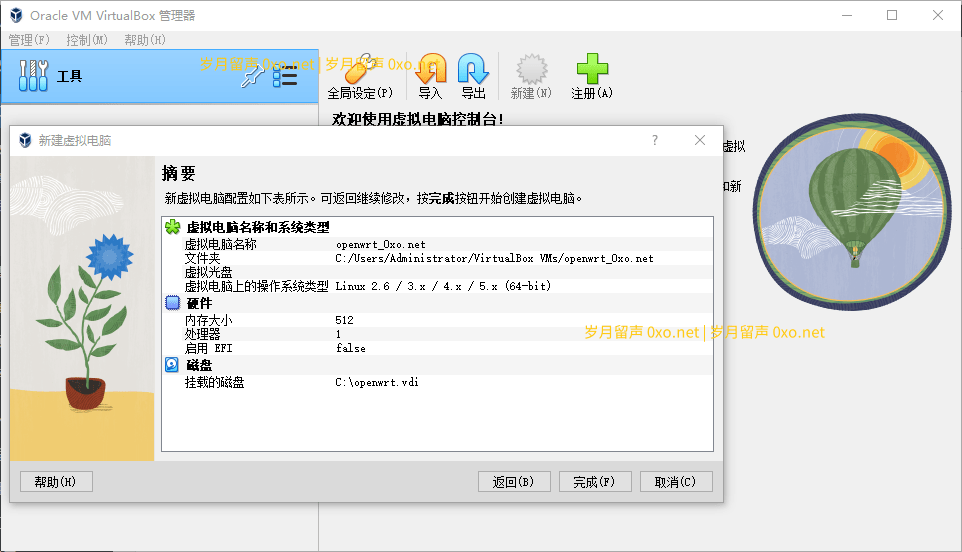
内存默认设置 256MB 即可,如果主机内存充足,调大一点也可以:
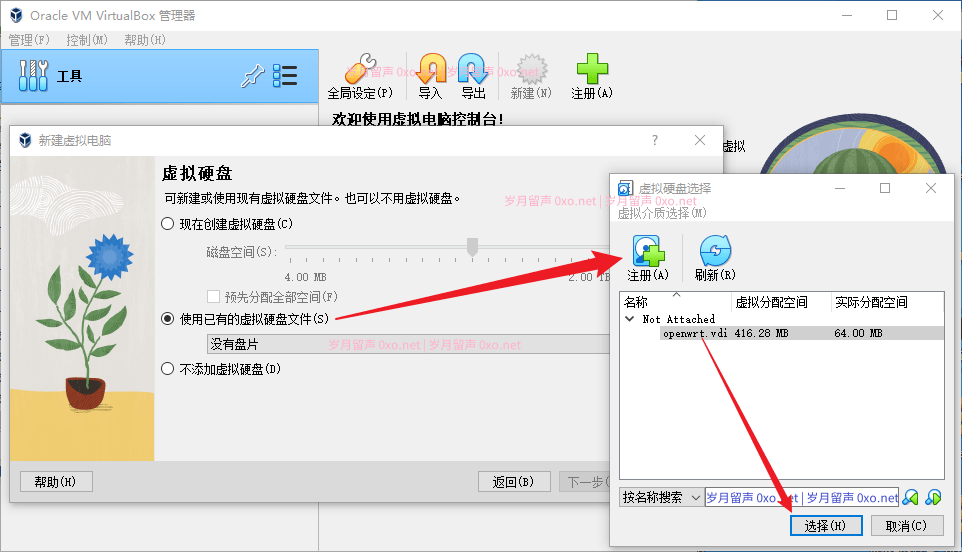
最后选择「使用已有的虚拟硬盘文件」,注册选择前面转换好的 openwrt.vdi 镜像:
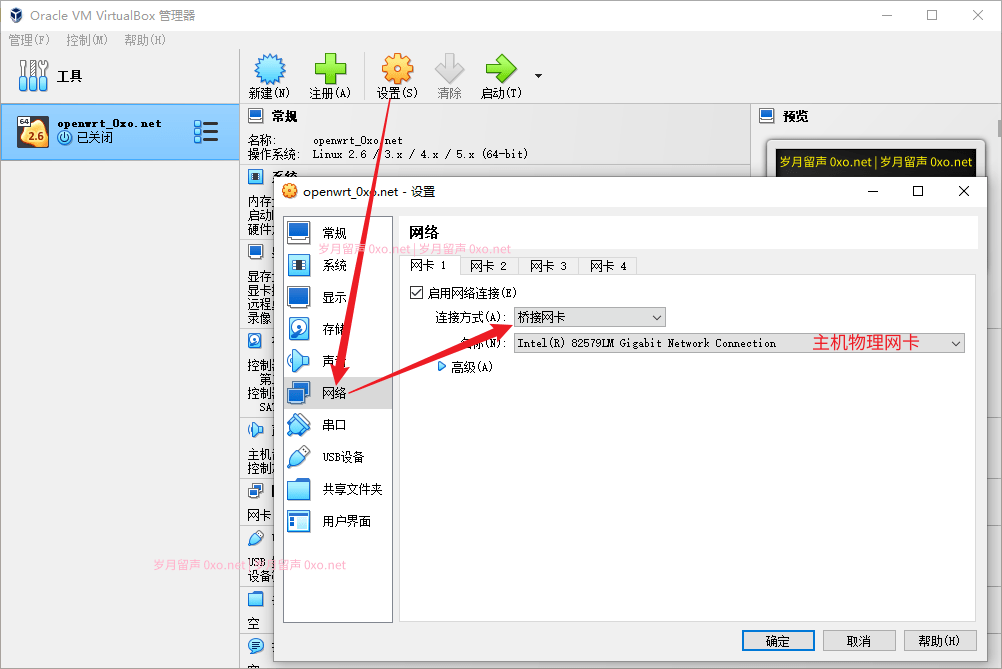
接着设置网卡,旁路由设置一个网卡即可,桥接网卡:
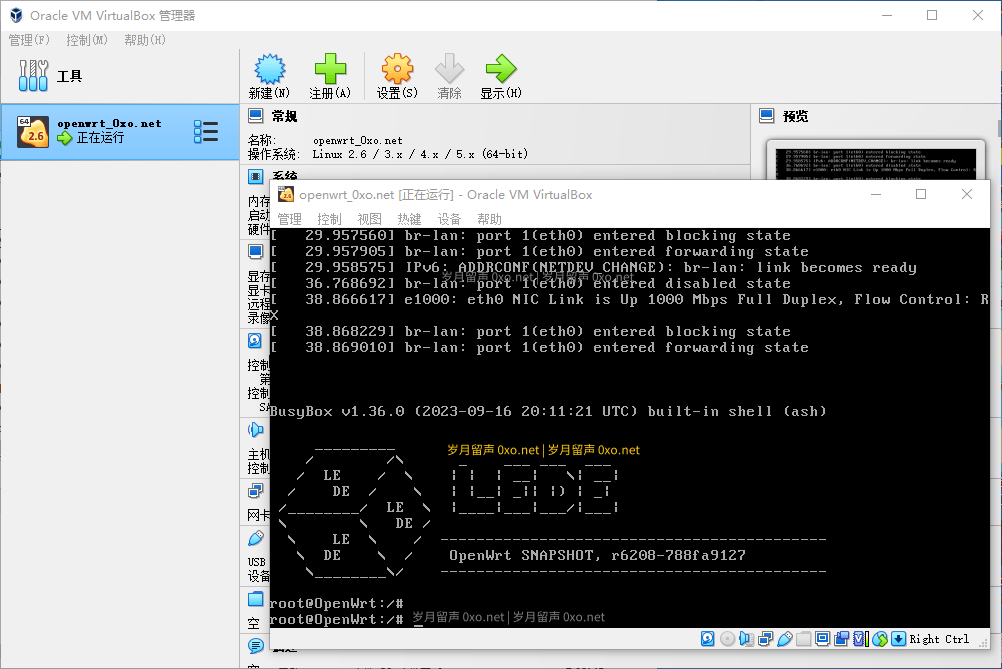
接着就可以启动 OpenWrt 虚拟机,按 Enter 键可登陆到 OpenWrt 终端:
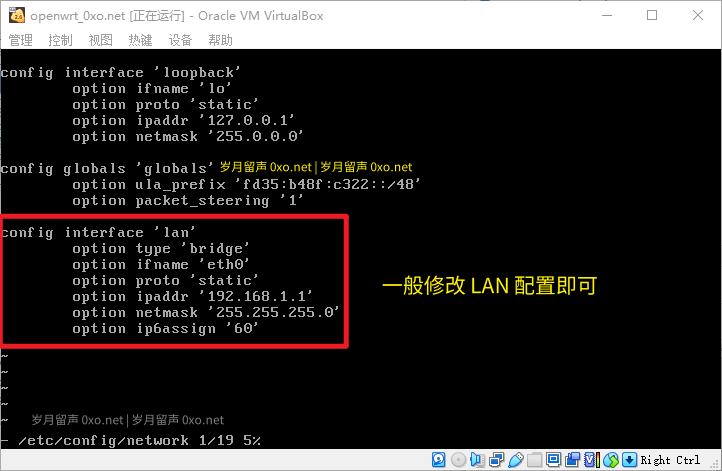
然后配置 OpenWRT 网络 network:
vi /etc/config/networkLAN 口参考配置:(请根据实际网络配置网段,这里以 192.168.11.x 网段为例,虚拟 OpenWrt 管理地址设置为静态:192.168.11.11)
改为:
config interface 'lan'
        option ifname 'eth0'
        option proto 'static'
        option ipaddr '192.168.11.11'
        option netmask '255.255.255.0'
        option ip6assign '60'
        option gateway '192.168.11.1'
        option dns '119.29.29.29'
然后执行命令 /etc/init.d/network restart 重启网络服务。
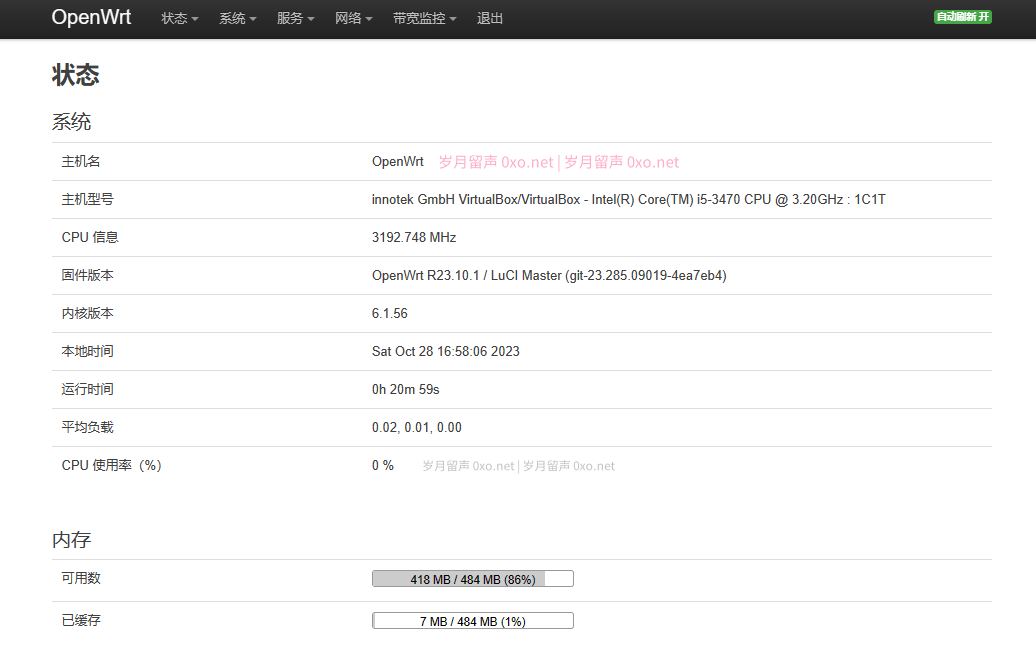
如无意外,浏览器打开 192.168.11.11 就能进入路由器管理页面。(另外,如果不想修改代码配置,也可以将主机 ip 地址设置为 192.168.1.x 网段,然后 192.168.1.1 登录路由器再配置网络)
默认用户名:root,密码:password
旁路由设置
方法与之前 N1 旁路由配置方法大同小异。
OpenWrt 旁路由
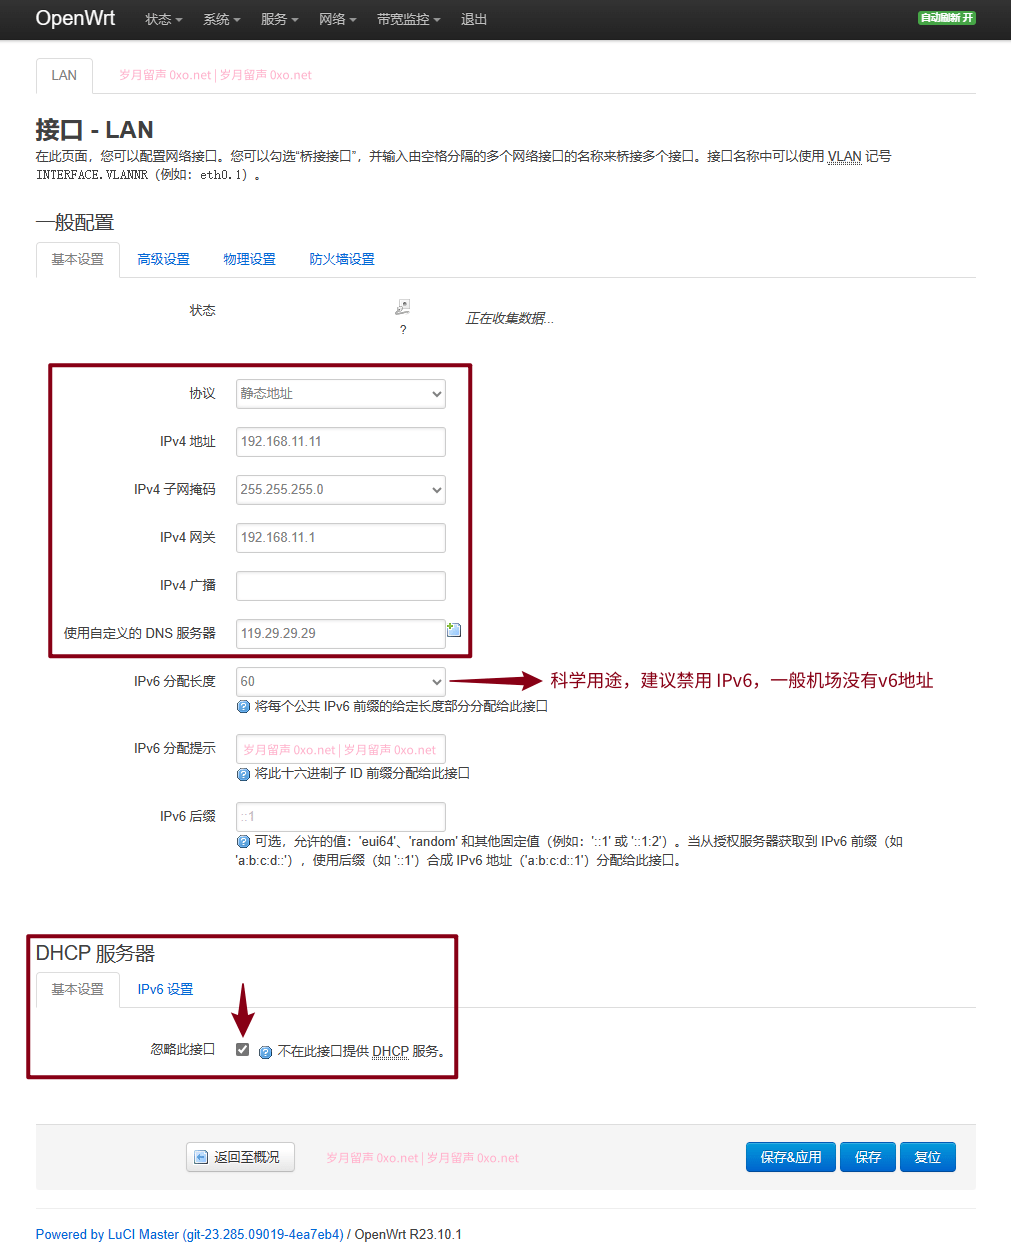
关闭 DHCP,网关填主路由 IP(如 192.168.11.1),DNS 可以为主路由 IP 或 119.29.29.29,8.8.8.8 等公共 DNS,禁用 IPv6:
切记先配置好旁路由 IP 地址再取消桥接!「物理设置」中「桥接接口」取消掉:
主路由设置
方法一是开启 DHCP,并且将主路由 DHCP 网关和 DNS 填旁路由 IP(如 192.168.11.11);
建议使用方法二,主路由开启 DHCP,不改动,仅将需要使用旁路由科学加速的设备手动指定网关和 DNS 到旁路由地址(如:192.168.11.11)。
另外,如果旁路由数据不稳定,可在防火墙添加自定义规则试试:
iptables -t nat -I POSTROUTING -o eth0 -j MASQUERADE参考资料
OpenWrt 使用 VirtualBox 部署以及网络环境 (NAT+Host-Only)(二)
固件和虚拟机下载:
2020-04-12:OpenWrt (x86_x64) combined squashfs 镜像。
2023-10-21 更新:openwrt-x86-64-generic-squashfs-combined(新版本)
虚拟机打包下载:VirtualBox-7.0.12-159484+OpenWRT_R23.10.1(已转换好)
任何服务均有跑路风险,请注意甄别防范!!备用节点参考:大哥云、万城v-city、飞机云、搬瓦工JMS、极客云……解压及网盘密码 1024


